Hack-e-Sta: May 2014

Saturday, 31 May 2014

How to add worked at your Facebook Page.

Nowadays, everyone has an Facebook Page. They want to add it to their profile that they work at the page but Facebook does not allow them to. Here is a simple work around for that.
* First Download an "Web Developer" extension for your browser (Google Chrome) (In Google chrome apps search for web developer tool)


*If you are a page admin > go to your page> Update info> note down your Facebook page ID (For example say 127458307291610)
*If not an admin> Request page admin for ID

*Then go to your profile> update Info> Under Work and Education Section
-"write page name" (No matter if it doesn't list select any one)

*After selecting any page Click on "Web Developer" icon (Gear Icon)
> click on forms> Then click on display form details.

##all forms details will display for your page##

*search for below syntax
<input autocomplete="off" name="employer_id"> 127458307291619 (Example ID for other page 127458307291619)

*Just replace ID: 127458307291619 with your FB page ID 127458307291610

*Then Disable the "Form Details" from extension

*Fill necessary info and save the changes
##You will see the exact page in your "work and education" which you want.##
Thanks to MD Mohsin for the above method.

How to have multiple authors on blogger.

Hi there.
Many of us today use blogger to show off our skills and hobbies but still many of us don't know that we can have multiple authors on a blog and work as a team.

Today I will show you how to do that.


  • 1.Sign in to Blogger
  • 2.Go to the Settings for your blog. Click the link for Permissions.
  • 3.You should see a display like the image at the beginning of this article. Click the "Add Authors" button to add one or more new authors to the list of people who can write posts for your blog.
  • 4.After you click the "Add Authors" button, a form opens. Enter the email address for each new author you want.
  • 5.Blogger sends an email invitation to each person you listed in Step 4. If they agree to participate in writing the blog, they respond to the email affirmatively. Blogger does the rest for you.


  • English Dub of Dragon Ball Z : Battle Of Gods

    Hi there Guyz.


    All DBZ fans are sure to be surprised  when I tell you that The Official Funimation Dub of Dragon Ball Z: Battle OF Gods is scheduled to be released in August.

    For more info log on to www.dragonballz.com

    For trailer:
    https://www.youtube.com/watch?v=PV-sgQUB9H0

    Sorry this is not from Official Funimation Channel because it has been restricted to some countries.

    Friday, 30 May 2014

    Android on your PC.

    Hi Guyz!

    Do you have an Android phone?
    Do you want to have an Android phone?

    Well your problems are solved,
    Thanks to the Developers at www.android-x86.org


    You can download an Android OS from here.

    For installation guide go here.

    If you have problems comment below or contact the android-x86.org.


    OldNewExplorer - make your 8.1 explorer work like Win7/8 one

    What is it?
    OldNewExplorer is the Windows 8.1 (and Windows 8) shell extension / tweaker which can undo "improvements" to file browsing made in newer Windows version. Everything is optional for your liking.

    - Restore devices / drives grouping
    Everything is 'Devices and drives'. That's stupid! O-N-E can restore grouping which made sense in Win7/8.
    - Restore libraries / remove folders
    Remove all those folders which were unoptionally added into Windows 8.1 This PC folder and put the libraries back to their place, without registry hacking / breaking apps.
    - Restore command bar / remove Ribbon
    Because some people consider it an abomination.
    - Restore details pane at bottom
    Same reason; reclaim useful horizontal space.
    - Improve styling
    Get rid of some Win7 stuff here and there; improve styling with some built-in visual styles.
    For themers / skinners, O-N-E can help to override a lot of hardcoded styling in Windows 8, maybe even Start screen!

    cream.png

    Download
    TEST VERSION READ BELOW
    100% FREE

    Stupid FAQ
    - This is a TEST version, no installer. Potentially dangerous too!
    - This is for Windows 8.1. Also should work for Windows 8 as well, though 8.1 options do not apply there;
    - All but class drive grouping is not enabled by default. If something does not apply, try logging off / restarting explorer.exe;
    - Install is for all users, settings are per-user.

    Source: Tihiy at msfn.org

    Customize “Win+X” Menu in Windows 8 – Add, Remove, Rename or Move Shortcuts

    Microsoft has made many changes in Windows 8. A brand new Start Screen has been added which unfortunately has replaced the good old Start Menu.
    Microsoft has also removed Start button (ORB) from Windows 8 Taskbar and has replaced it with a new Start Screen thumbnail which appears when you move your mouse cursor to bottom-left corner of screen.
    To make Windows 8 users life easier, Microsoft has added a new context menu which appears when you right-click on extreme bottom-left corner of screen. I personally prefer to call it "Quick Access Menu" similar to Quick Access Toolbar present in Ribbon UI of Windows 8 Explorer or Microsoft Office 2010.
    Windows_8_Consumer_Preview_Quick_Access_Menu.png
    You can also use keyboard shortcut "Win+X" to access this new quick access menu. This new menu provides quick access to lots of useful Windows utilities such as Power Options, Command Prompt, Control Panel, etc.
    But did you know you can customize this new menu in Windows 8? Yep, I accidentally found an interesting way to customize this new menu present in Windows 8.
    So without wasting time, let me share the hidden secret way to customize this new Quick Access Menu of Windows 8:
    Customize Quick Access Menu in Windows 8:
    I was looking into various system folders of Windows 8 to find out what's new and where are all new UI resources present in Windows 8. Then suddenly I found following hidden folder:
    C:\Users\user_name\AppData\Local\Microsoft\Windows\WinX
    As the name suggests "WinX" folder contains all shortcuts which are displayed in new Quick Access Menu (Win+X) in Windows 8.
    To access above mentioned folder, press Win+R keys together to open RUN dialog box and then type appdata and press Enter.
    Now you can easily go to "Local\Microsoft\Windows\WinX" folder. Once you open "WinX" folder, you'll notice 3 sub-folders under it:
    • Group1
    • Group2
    • Group3
    Actually the new Quick Access Menu is divided into 3 groups as shown in following image:
    Windows_8_Quick_Access_Menu_Groups.png
    And the 3 folders Group1, Group2 and Group3 present in "WinX" folder contains those shortcuts respectively.
    Following are screenshots of all these 3 folders content:
    Group1 Folder:
    Windows_8_Quick_Access_Menu_Group1.png
    Group2 Folder:
    Windows_8_Quick_Access_Menu_Group2.png
    Group3 Folder:
    Windows_8_Quick_Access_Menu_Group3.png
    As you can see in the above images, all 3 group folders contain same shortcuts which are shown in Quick Access Menu in Windows 8.
    Removing Shortcuts from Quick Access Menu in Windows 8:
    First thing which you can customize in this Quick Access Menu is removal of unwanted shortcuts.
    Quick Access Menu contains lots of shortcuts and you might not use a few of them. So you can delete unwanted shortcuts to make the context menu short and to easily find the shortcuts which you want to use.
    1. To remove a shortcut, simply go to that Group folder and delete the shortcut.
    For example, if you want to delete "Command Prompt" shortcut, go to "Group3" folder and delete "Command Prompt" shortcut.
    2. Now you'll need to either log off or restart Explorer to take effect.
    3. That's it. Now you'll not see that removed shortcut in context menu.
    Removing_Shortcuts_Quick_Access_Menu_Windows_8.png
    As you can see in above image, "Command Prompt" shortcut is not present in Quick Access Menu.
    Renaming Shortcuts in Quick Access Menu in Windows 8:
    You can also change names of shortcuts shown in Quick Access Menu. For example, you can change name of "Command Prompt (Admin)" to some other name such as "Terminal", etc.
    1. To rename a shortcut, first maximize the ribbon in Windows Explorer. Click on small arrow present below the Close button and it'll maximize the ribbon. You can also press "Ctrl+F1" keys together to toggle the ribbon.
    2. Now go to "View" tab and enable "Hidden Items" checkbox.
    3. Now open the Group folder which contains your desired shortcut and you'll see a hidden file"Desktop.ini".
    4. Double-click on "Desktop.ini" file and it'll open in Notepad.
    5. You'll see a list of all shortcuts present in Quick Access Menu along with some file names and random numbers. Actually this file defines the labels or names of shortcuts which you see in Quick Access Menu.
    The first part of a line contains shortcut's file name such as "06 - System.lnk" and the second part after the equal sign (=) defines its label in context menu such as "@%SystemRoot%\system32\systemcpl.dll,-1". These labels are pre-defined in those system files.
    6. To change the name of a shortcut, you just need to replace the label part given after the equal sign (=) with your desired name.
    For example, we are going to change "System" shortcut name to "System Properties".
    To do this, we'll just replace the whole "@%SystemRoot%\system32\systemcpl.dll,-1" string with "System Properties" string as shown in following screenshot:
    Renaming_Shortcuts_Quick_Access_Menu_Windows_8.png
    7. That's it. Once you replace the label and save the file, again restart Explorer or log off and you'll see new name in context menu:
    Shortcuts_Renamed_Quick_Access_Menu_Windows_8.png
    Moving Shortcuts in Quick Access Menu in Windows 8:
    You can also ungroup all these shortcuts present in Quick Access Menu. For example you can move all shortcuts in a single group to remove separators between the groups or you can also create new groups for desired shortcuts.
    1. To ungroup all shortcuts, simply move all shortcuts in a single folder.
    For example, you can move all shortcuts present in "Group1" and "Group2" folders to "Group3" folder. Restart Explorer or log off and you'll see all shortcuts in a single group in Quick Access Menu. You'll not see any separator between shortcuts.
    2. To create new group, simply create a new folder such as "Group4" in "WinX" folder and move the desired shortcuts from other group folders to this new folder.
    Create_New_Shortcut_Group_Quick_Access_Menu_Windows_8.png
    That's it. Restart Explorer or log off and you'll see a new group in context menu:
    New_Shortcut_Group_Quick_Access_Menu_Windows_8.png

    Source: Askvg.com

    Tuesday, 20 May 2014

    TeamViewer Windows 8 controller.

    Hi Guyz, I am back with another Android Appplication. If you want iOS, sorry  I have no experience with it.

    So, The new app is Teamviewer, its similar to Windows8Controller but better.

    Download Teamviewer PC from here
    and
    Download Teamviewer for android from Playstore.

    Get its support from Teamviewer Support.


    Note: Using Windows8Controller is better if you are not connected to internet, or having slow speed.

    Friday, 16 May 2014

    Want to have a wireless controller, here you have it Windows 8 Controller

    Hiya,
    You can now control your PC with your smartphone , To get started you just need a few things.


    Requirements:
    1. An android smartphone
    2. Windows PC with a WiFi Card
    3. A WiFi network (not necessary )

    Downloads:
    1.Download Windows 8 Controller Server App and Android App from here.
    2. Download Virtual Router Plus(if you don't have a WiFi network.) from here.


    Procedure:

    1. Install and open the Win8Controller Server App.

    Server App connected


    2. Open Windows 8 Controller Application on your smart phone and choose auto-connect and you will see a similar picture. If you are not able to connect make sure the smartphone and PC are on same WiFi network or the phone is connected to Virtual Router Network hosted by your PC. If still you are not able to connect, try manual connect and follow the steps.

    3. After connecting, you will see a black screen on your phone. Try moving the mouse using your phone by moving your finger around the screen.


    4. If you need help, Please comment.

    ********************************************************************************

    Note: Windows 8 Controller also has a Pro version available for smartphones but it costs a bit, to download it for free, Google it or download from here.

    Tuesday, 13 May 2014

    Increase your Internet speed for Windows PC users.


    Hi, Today I am going to teach you how to get some speed by changing a few windows settings which takes 20% (80%  in Windows 8 and above)

    1. Open RUN box by pressing Windows Key + R.


    2. Type gpedit.msc in it.
    3. Goto  Local Computer Policy> Computer Configuration> Administrative Templates> Network > QoS Packet Scheduler in the left pane.

    4. Double Click on limit reservable bandwidth in the right pane.
    5. In the opened window, choose Enabled and change Bandwidth Limit(%) to 0.


    6. Click on OK and close all opened windows.
    7. Test your speed now. Hope this helps you a bit.

    *********************************************************************************
    Note: For those who cannot open gpedit.msc in Step 2, your PC does not support this trick. 

    Saturday, 10 May 2014

    How to recover data from a formatted CD.

    Did you accidentally format your DVD/CD. Want to recover lost data from it. You don't need data recovery tools which take hours. You only need a couple of tools which you probably may have.
    To recover lost data:
    Tools: (i)PowerIso (Download PowerIso)
              (ii) ImgBurn (Download ImgBurn) or any other tool which will extract an .bin from the CD.
    Steps:

    i) Insert the formatted CD into your CD Drive.
       You will notice that explorer is showing that CD has some data but when you open the CD you see that the CD is empty.


     ii) Open ImgBurn and Create an Image file from a disk.


    iii) Locate the image file on your hard drive and open it with PowerIso.


    iv) Voila!!! The contents of the disk are present there.

    v) Extract it to any place you want.

    Enjoy.

    Method 2:
     You can also create an ISO instead of .bin and extract it with WinRar.

    Thursday, 8 May 2014

    Method to invite all contacts to event or to like a page. (All browsers).

    1. Click Invite Friends on whatever you are inviting people to
    2. In the dropdown next to the search box, click Search All Friends
    3. Scroll ALL the way down until names stop loading (I found it easy to click the first name and then hold down the spacebar or Page Down button)
    4. For EVENTS :
    Drag this to bookmarks

    For PAGES :
    Drag this to bookmarks

    Wednesday, 7 May 2014

    How to root Samsung Galaxy S Duos 2 via pre-rooted firmware

    PRE-ROOTED-LATEST FIRMWARE:
    PROCEDURE:
    1). INSTALL 7ZIP LATEST SOFTWARE ON TO YOUR PC.

    2). DOWNLOAD THE ABOVE FILES AND PLACE THEM ALL IN ONE FOLDER ON YOUR PC.

    3). RIGHT CLICK ON pre_rooted_GT-S7582.7z AND SELECT 7ZIP.

    4). THEN SELECT OPTION "EXTRACT HERE" NOW YOU WILL GET THIS ONE FILE NAMED pre_rooted_GT-S7582.tar .
    5). DOWNLOAD ODIN ANY VERSION AND OPEN THE ODIN,EXE.

    6).THEN SELECT PDA, BROWSE FOR pre_rooted_GT-S7582.tar FILE AND SELECT IT.

    ENTERING DOWNLOAD MODE:

    1). SWITCH OFF YOUR MOBILE, AND PRESS VOLUME DOWN+HOME KEY+POWER KEY ALL AT ONCE AND WAIT FOR DOWNLOAD MODE TO COME.
    2). PRESS VOLUME UP KEY TO CONTINUE INTO DOWNLOAD MODE.

    FLASHING THE FIRMWARE FILE:

    1). NOW CONNECT YOUR MOBILE TO PC VIA USB CABLE.

    2). THEN PRESS START IN ODIN, THEN LET ODIN DO ITS JOB.

    3). YOUR MOBILE WILL REBOOT AFTER FLASHING COMPLETED BY ODIN.

    4). FINALLY CHECK FOR, SUPERUSER.APK, AND YOUR MOBILE IS ROOTED 

    Note: The article has been copied from XDA Developers by Chirtagh

    Must have Windows Applications.

    After posting Must have Android Applications, here is a list of Must have Windows Applications.

    1. Cheat Engine (Download) :
    From cheating in a game to hacking your internet speed, Cheat Engine does      it all.Must have this application even if you are a standard user. Has got a very simple interface and any          one can easily learn to use it.
    Cheat Engine 6.2

    2. TeraCopy (Download): One of the fastest and best file copying utility for Windows. Must have if you are going to copy lots of data.
    TeraCopy 1.22 

    3.VLC Media Player (Download):  One of the best media players around. Supports almost every format.    Must have for frequent movie or season watchers.
    Madagascar 2 on VLC
    4. Any Video Converter Ultimate (Download Crack) : The best video converter on the Internet. Must have for video downloading, converting, ripping and recording.

    Any Video Convereter

    5. ImgBurn (Download): The best CD/DVD tool for reading, writing to a DVD. Can create bootable DVDs,DVD games for consoles like PS2 and many more exciting features.

    ImgBurn
    You are free to add to this list. Just write your Must have app below in comments.


    Must have applications for android.

    List of must have applications for android:
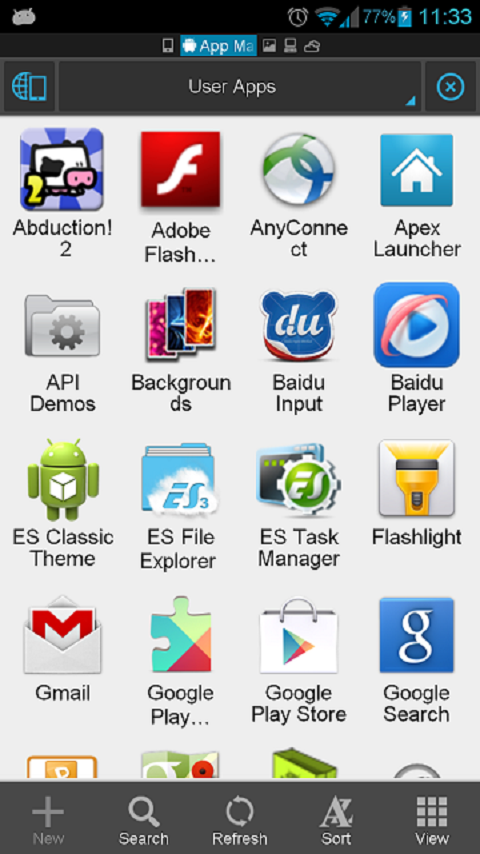
    1. ES File Explorer (Download) : ES File Explorer is an all in one File Explorer, Manager, Application Manager and can share any Application in .apk form. It also has a network manager.
    Complete Description:ES, 300 millions global downloads, file manager trend leader on Android!
    Rated as one of best resource management tools on Android market.
    ES File Explorer is a free, full-featured file and application manager.
    It functions as all of these apps in one: file manager, application manager, task killer, download manager, cloud storage client (compatible with Dropbox, Google Drive, SkyDrive, Box.net, Sugarsync, Yandex, Amazon S3, and Ubuntu One...), FTP client, and LAN Samba client.
    It provides access to pictures, music, video, documents, and other files on both your Android devices and your computers.
    ES File Explorer allows Android users, no matter where they are, to manage their resources freely. You can access all of your files from your mobile device and share them with others. This app makes it easy to stay connected over 3G, 4G, EDGE, or Wi-Fi to share with friends, upload photos, and watch videos.
    ES File Explorer 3.0 currently supports 30+ languages:
    English, Russian, Japanese, Korea, French, Spanish, German, Italian, Czech, Hungarian, Ukrainian, Tamil, Catalan, Turkish, Lithuanian, Portuguese...
    This standard version is for Android 2.1, 2.2, 2.3, 3.1, 3.2, 4.0, 4.1,4.2 and 4.4. Android 1.5 ~ 2.0 users, please use ES File Explorer Cupcake.
    You can download older version from our official website.Classic Theme can be downloaded on Google Play.
    Features List:
    * File Manager – Manage your files like you do on your desktop or laptop using Multiple Select, Cut/Copy/Paste, Move, Create, Delete, Rename, Search, Share, Send, Hide, Create Shortcut, and Bookmark; operations can be performed on local files (on Android device) or remotely (on your computer)
    * Application Manager – categorize, uninstall, backup, and create shortcuts to your apps
    * Remote File Manager – when enabled, manage files on your phone from your computer
    * Built-in ZIP and RAR support allows you to compress and decompress ZIP files, unpack RAR files, and create encrypted (AES 256 bit) ZIP files
    * Built-in viewers and players for various file types, including photos, music, and videos; supports third-party applications, such as Quick office, for opening others
    * Shows thumbnails for APKs and images
    * Text viewers and editors
    * Access your home PC via WiFi with SMB
    * Functions as your FTP and WebDAV client. Manage files on FTP, FTPS, SFTP, and WebDAV servers just like you manage files on your SD card
    * Supports Dropbox, Box.net, Sugarsync, Google Drive (Google Docs is now a part of Google Drive), SkyDrive, Amazon S3, Yandex and more.
    ES File Explorer is an enhanced cloud storage client with more functions than the official versions,
    it can save photos, videos, and other files to your internet drives and share them with others.
    * Bluetooth file browser You can copy and paste files between Bluetooth ready devices. It supports OBEX FTP for browsing devices and transferring files between Bluetooth devices.
    * Kill tasks with a single click, increase memory and speed up your device -- includes a simple widget that stays on your home screen for knowing your current RAM situation and automatically killing tasks, with an ignore list to ignore the applications you want to keep running.Task Manager module required
    * Cache Cleaner and Autostart manager -- Delete those junk files that take up valuable storage space.Task Manager module required.
    * Root Explorer -- the ultimate set of file management tools for root users. Provides access to the entire file system and all data directories, and allows the user to change permissions.
    * Developers can visit our website for the developer interface for picking files from your applications, emailing attachments, etc.
    * More features included, and more to come

    2. MX Player(Download) :It is a must have video playet for all video formats.
     Complete description:
    MX Player - The best way to enjoy your movies.

    a) HARDWARE ACCELERATION - Hardware acceleration can be applied to more videos with the help of new H/W decoder.
    b) MULTI-CORE DECODING - MX Player is the first Android video player which supports multi-core decoding. Test result proved that dual-core device’s performance is up to 70% better than single-core devices.
    c) PINCH TO ZOOM, ZOOM AND PAN - Easily zoom in and out by pinching and swiping across the screen. Zoom and Pan is also available by option.
    d) SUBTITLE GESTURES - Scroll forward/backward to move to next/previous text, Up/down to move text up and down, Zoom in/out to change text size.
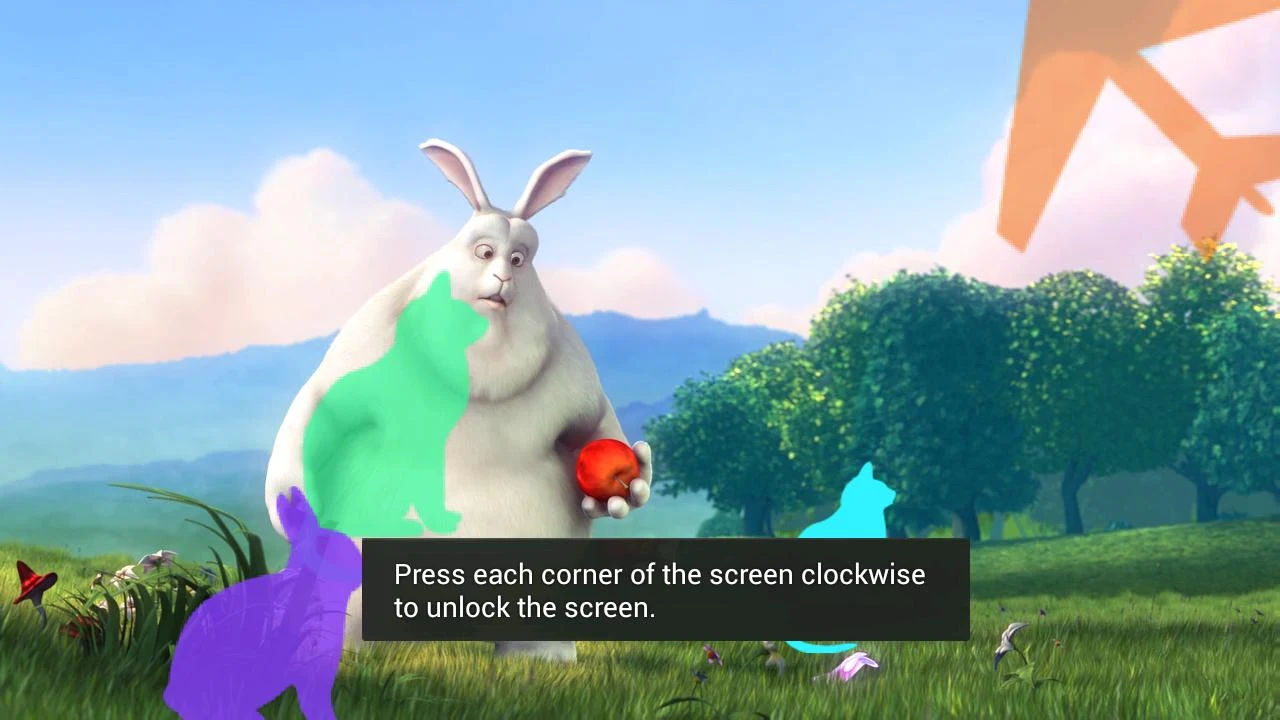
    e) KIDS LOCK - Keep your kids entertained without having to worry that they can make calls or touch other apps. (plugin required)

    Subtitle formats:
    - DVD, DVB, SSA/ASS Subtitle tracks.
    - SubStation Alpha(.ssa/.ass) with full styling.
    - SAMI(.smi) with ruby tag support.
    - SubRip(.srt)
    - MicroDVD(.sub/.txt)
    - SubViewer2.0(.sub)
    - MPL2(.mpl/.txt)
    - PowerDivX(.psb/.txt)
    - TMPlayer(.txt)

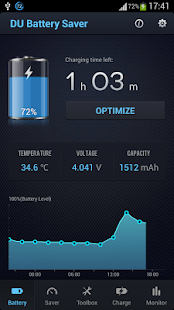
    3. DU Battery Saver (Download): A must have app for saving your battery.
    Complete Description:

    Celebrate Earth Hour with DU Battery Saver, WIN cool prizes on http://duapps.com/earthhour/ !
    DU Battery Saver is a FREE battery saving app that makes your battery last longer! Get up to 50% more battery life for your Android tablets and phones with smart pre-set battery power management modes and easy one-touch controls that solve battery problems and extend battery life. It’s the simplest way to keep your Android phone working when you need it and protect against poor charging, battery hogging apps and overlooked device settings that can shorten your battery life.
    Over 40,000,000 users' choice! Upgrade to PRO and get up to 70% battery power savings!
    >>> THE WORLD'S LEADING BATTERY SAVER & POWER MANAGER! <<<
    ● Global Saver — 17 languages supported (French, Spanish, Portuguese, Russian, Arabic, German, Bahasa Indonesia, Japanese, Chinese, Korean and more)
    ● Easy & Powerful Saver — Increase your battery life by up to 50%
    ● Simple Saver — Use smart pre-set battery power management modes or create your own to get high performance and great energy savings
    ● Convenient Saver — “Optimize” desktop widget allows you to stop power-consuming background apps with a one-touch to boost your battery life
    ● Fast Saver — Instantly find battery power saving problems with the “Optimize” button
    ● Effective Saver — Protect your battery with healthy battery charging to extend life of your battery
    ● Adapts to You — Automatically save energy with Smart Power settings (PRO upgrade).
    >>> POWERFUL FREE BATTERY SAVING FEATURES <<<
    ● ACCURATE STATUS — Smart technology helps you know exactly how much charge you’ve got left with detailed analysis of Android apps AND hardware (CPU, display, sensors, WiFi, radio, etc.)
    ● SMART PRE-SET MODES — Choose mode that fits your energy usage, or customize to find the right balance of battery life and performance using our smart battery saver:
    - General Mode — Save battery power even while keeping most Android services running;
    - Long Standby — Keeps dialing and SMS available while maximizing standby time;
    - Sleep Mode — Turns off most services except the clock, to save your battery power until the morning
    - Custom Mode — Create your own mode to get exactly the energy savings you need
    ● ONE-CLICK OPTIMIZE — Instantly discover and fix battery power-consumption problems and unlock detailed settings to super-tune your energy savings
    ● ANYTIME OPTIMIZATION — Manage background apps and Android phone hardware easily and safely with smart home screen widget (i.e. Battery level widget, Hardware switch widget, Mode switch widget);
    ● BETTER BATTERY DETAILS — Show Android phone battery power level by % or time remaining;
    ● HEALTHY CHARGE MANAGER— Track and implement healthy charging practices to keep your battery working at its best;
    >>> MUST-HAVE PRO FEATURES of DU Battery Saver (In-App Purchase)<<<
    ● INTELLIGENT MODE-SWITCHING: Automatically switch smart battery saving modes based on your preferences
    - Battery Level — Switch to any preset mode when the battery power reaches a specific level;
    - Time Schedule — Switch to any smart battery saver mode based on time of day;
    ● AUTO-CLEAR APPS: Automatically shuts down battery power-draining apps that run in the background;
    - Set an Auto-Clear schedule at any interval you choose;
    - Protect important apps from auto-clear by adding them to the Ignore List.
    - Clears unnecessary background power consumption apps on screen lock
    ● CPU FREQUENCY (Root devices): Save even more power by reducing the speed of your Android phone’s processor when the screen locks.

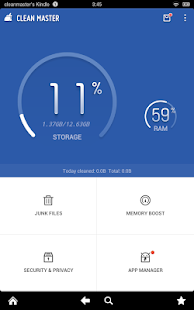
    4. Clean Master (Download) : An important app because it deletes your junk and cleans up your ram for a faster phone.
    Complete Description:
    Simple, thorough, and safe, Clean Master is the world’s most downloaded Android optimization app designed to clean junk files, regain free storage, boost memory, enhance speed, and secure your device from malicious apps and vulnerabilities. Brought to you by Cheetah Mobile (formerly known as KS Mobile).
    More than 200 million people worldwide use Clean Master to remove junk from their devices and to prevent malware infections. Clean Master improves performance by optimizing device memory, unclogging storage and offering security against viruses, trojans and malware. Developed by Cheetah Mobile (formerly KS Mobile), Clean Master is the world’s most reliable companion for Android devices.

    Highlights of Clean Master - Optimization & Antivirus
    ☆ Thorough: The junk-creating behavior of millions of apps has been analyzed so that Clean Master can efficiently hone in on its targets (cache and residual files) with perfect accuracy.
    ☆ Fast & Intuitive: Simple to use, super-fast and smooth UI, plus cool transition effects
    ☆Ranked #1 by AV-TEST, providing professional security protection. Scanning takes only 8 seconds, 500% faster than other paid antivirus apps.

    Features of Clean Master- Optimization & Antivirus
    ► JUNK FILE CLEANING 
    Delete cache and residual files to reclaim memory and improve performance on your device and SD card.
    ► MEMORY BOOST 
    Boost all games and running apps, free up memory (RAM) and speed up your device. Our One-Tap Boost and Game Boost features make it easy to optimize directly from your homescreen.
    ► SECURITY & PRIVACY 
    Scan the system, pre-installed and user-installed apps to keep your device safe from viruses, trojans, vulnerabilities, adware and spyware. Remove personal and sensitive information to protect your privacy.
    ► APP MANAGER 
    Uninstall unwanted apps or bloatware and back up important ones. Some rooted devices will be able to move apps to the SD card as well as uninstall pre-installed and system apps. Our own App Picks lets you find useful apps that match your interests.

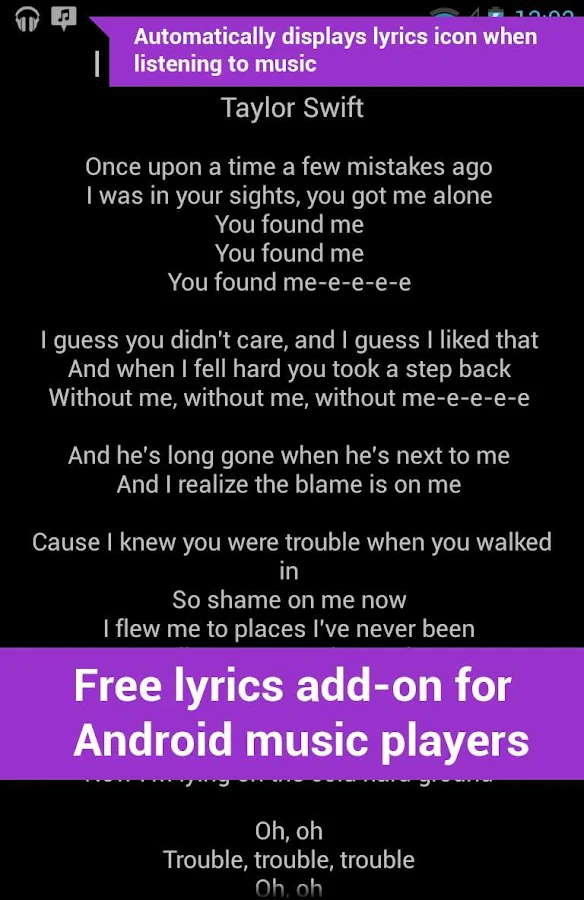
    5. Lyrics Grabber(Download):Lyrics Grabber is a free add-on for Android music players. You continue using your favourite music player as before but Lyrics Grabber adds functionality to view lyrics of any song you are listening to. When you start a song Lyrics Grabber gets its title and artist information from your music player and finds the lyrics for you. Small icon appears automatically on notification bar giving easy access to lyrics and disappears once the song has finished. Simple as that. Give it a try.
    - several popular music players are supported with more being added soon;
    - if your player isn't supported by default, but has setting/option to scrobble via Simple Last.fm or Scrobble Droid, turn that setting on; that way you can still enjoy Lyrics Grabber;
    - if automatic lyrics icon seems too intrusive, you can disable/enable it in the Lyrics Grabber menu
    - internet connection is required, but once lyrics is viewed at least once, it will be cached for offline use
    - option to edit lyrics (all changes are stored locally in your phone)
    Tips for specific audio players:
    * RocketPlayer - go to "Settings"->"Audio Settings"->"Installed Scrobbler" and set it to "Official Last.fm"
    * Cubed - go to "Preferences"->"Last.fm Scrobbling" is set to either "Simple Last.fm Scrobbler" or "Scrobble Droid".
    * MixZing - go to "Settings"->"General" and turn "Scrobble to last.fm" on; MixZing support works with little delay (~5 seconds), but is fully functional.
    * Winamp - make sure you have Last.fm app installed (https://play.google.com/store/apps/details?id=fm.last.android , you don't need to be Last.fm user); Winamp only sends song info when it can detect Last.fm app in the device.


    Note: All download links redirect to play store.
    Comment your own must have apps.
    Google+